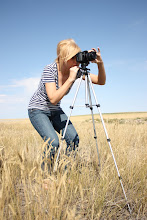
I officially got my website up last week, thanks to help from Dave.
It's a work in progress, definately, but I'm just glad it's up and running!
http://britneyhiggs.smugmug.com/
Thursday, November 5, 2009

Tuesday, November 3, 2009
Wildlife Portraits
Leave Wide-Angle Lenses in the Bag
It is better when shooting wildlife portraits to not use a wide-angle. This is because of the distortion that occurs when using a wide-angle lens. The perspective in which a photographer uses a wide-angle lens does not, for the most part, fit into wildlife portraiture.
Telephoto Advantages
Keeping your distance can be important while shooting animals that you could potentially hurt or that could potentially hurt you. Therefore, telephoto lenses come in quite handy. A telephoto’s “narrow angle of view also allows for a colorful-blurred out background and different focus points on your subject that can give it an artistic edge or whatever look you’re going for.
Build a Three Layer Picture Space
We saw this in a previous section. This is when you spilt up the picture into three planes – foreground, midground, and background. The foreground is composed of the blurred visions, or maybe greenery, insignificant subjects, or other things that are not crucial to have in focus. The midground is composed of your subject and this should, usually, be in focus. The background should also be out of focus… or whatever you’re going for.
Sizing up the subject
Don’t spend a whole lot of time shooting just any wildlife. Find the most attractive. J
Facial Features in Focus
To us humans, we care most about the facial features of an animal, therefore photographers usually tend to put their faces in focus.
Group Portraits
To take a wildlife group portrait, try focusing on only one subject and letting the others complement that particular subject. Try to capture the way the subjects relate to each other and the relationship that they have.
Lighting
Two best times for lighting: early in the morning or late in the afternoon. Take your pick.
Finding Photogenic Landscapes
Color First
In a great photograph, there is amazing color. Therefore, when shooting a landscape look for bright colors that capture the eye… particularly red.
Clouds Make the Difference
Clouds just emphasize the beauty of a landscape. Different photographers have different opinions on what kinds of clouds make the best portraits. In the book, the author says a few of his favorites are “the cotton ball, and cumulous variety.”
Calm Atmosphere for Detail
When you are by a body of water, there’s no wind, and the reflection of the mountains are shining off the top of the water, you have an amazing photograph and take the opportunity to shoot it.
Let It Snow
Snow and the “fog, mist and falling snow infuse ordinary landscapes with a moody energy.” Depending on the look you’re getting, shooting in the snow is a great way to get an artistic, creative landscape photo.
North/South Camera Angles
These particular camera angles will “record landforms when they are illuminated by sidelight.” To catch the lighting just right, using north/south angles will do that for you and you will be able to capture amazing photographs.
Foreground Detail
Catching foreground detail puts a certain beauty into the picture. The foreground detail is what catches your eye and brings you into the picture. It can have a pretty awesome, dramatic effect.
Lunar/Solar Accents
Check your calendar for awesome lunar/solar accents then go shoot ‘em!
No Human Artifacts
For “the most peaceful and productive experience” try really hard to find landscapes that are free from human symbols (telephone poles, highways, ect.) and humans to get that rustic, authentic feel to your photograph
Leave Wide-Angle Lenses in the Bag
It is better when shooting wildlife portraits to not use a wide-angle. This is because of the distortion that occurs when using a wide-angle lens. The perspective in which a photographer uses a wide-angle lens does not, for the most part, fit into wildlife portraiture.
Telephoto Advantages
Keeping your distance can be important while shooting animals that you could potentially hurt or that could potentially hurt you. Therefore, telephoto lenses come in quite handy. A telephoto’s “narrow angle of view also allows for a colorful-blurred out background and different focus points on your subject that can give it an artistic edge or whatever look you’re going for.
Build a Three Layer Picture Space
We saw this in a previous section. This is when you spilt up the picture into three planes – foreground, midground, and background. The foreground is composed of the blurred visions, or maybe greenery, insignificant subjects, or other things that are not crucial to have in focus. The midground is composed of your subject and this should, usually, be in focus. The background should also be out of focus… or whatever you’re going for.
Sizing up the subject
Don’t spend a whole lot of time shooting just any wildlife. Find the most attractive. J
Facial Features in Focus
To us humans, we care most about the facial features of an animal, therefore photographers usually tend to put their faces in focus.
Group Portraits
To take a wildlife group portrait, try focusing on only one subject and letting the others complement that particular subject. Try to capture the way the subjects relate to each other and the relationship that they have.
Lighting
Two best times for lighting: early in the morning or late in the afternoon. Take your pick.
Finding Photogenic Landscapes
Color First
In a great photograph, there is amazing color. Therefore, when shooting a landscape look for bright colors that capture the eye… particularly red.
Clouds Make the Difference
Clouds just emphasize the beauty of a landscape. Different photographers have different opinions on what kinds of clouds make the best portraits. In the book, the author says a few of his favorites are “the cotton ball, and cumulous variety.”
Calm Atmosphere for Detail
When you are by a body of water, there’s no wind, and the reflection of the mountains are shining off the top of the water, you have an amazing photograph and take the opportunity to shoot it.
Let It Snow
Snow and the “fog, mist and falling snow infuse ordinary landscapes with a moody energy.” Depending on the look you’re getting, shooting in the snow is a great way to get an artistic, creative landscape photo.
North/South Camera Angles
These particular camera angles will “record landforms when they are illuminated by sidelight.” To catch the lighting just right, using north/south angles will do that for you and you will be able to capture amazing photographs.
Foreground Detail
Catching foreground detail puts a certain beauty into the picture. The foreground detail is what catches your eye and brings you into the picture. It can have a pretty awesome, dramatic effect.
Lunar/Solar Accents
Check your calendar for awesome lunar/solar accents then go shoot ‘em!
No Human Artifacts
For “the most peaceful and productive experience” try really hard to find landscapes that are free from human symbols (telephone poles, highways, ect.) and humans to get that rustic, authentic feel to your photograph
Thursday, October 29, 2009
Getting Close/Animals in Action
Getting Close
Wildlife Rules:
If a subject is running/flying/swimming away from you as you approach... then stop moving towards them. Give your subject some space. Plan on spending some time at the place where you're wanting to capture a subject... let them come to you.
Do your homework:
Find out where your subject is going to be, the enviornment that they are usually at, at a certain time and wait there.
Keep your distance:
This is pretty self explanatory. :)
Stalking strategies:
"stay low, move slowly and quietly" when subject is not eyeing you.
Rest every once and a while, to make sure not to move up to quickly
get ready to shoot at any time
Don't Fence them in:
wildlife will feel threatened if you close them in, so avoid it at all cost. You could end up getting trampled, hurting the wildlife, or just losing a good shot.
Vehicles make good blinds:
Use your vehicle as camaflouge!
Peanut Butter Incentitives:
Some photographers like to use bait to bring their subjects to them. This is under your personal disgretion on whether this is ethical or not.
Animals in Action
Be on site before the sun sets:
This is crucial to good photography. Make sure to be there before the sun is setting and you can get some awesome photographs.
Lower that Tripod:
Get down to eye level to provide a more intimate, at their level, kind of feel.
Shoot first, edit later:
Don't be looking at your camera while you're in the field... you may miss some amazing shots!
Sharping your focus technique:
Use manual focus to focus an image that is in motion. It is often harder to try and use auto focus in these situations because the camera is usually not quick enough to pick out the spot of focus.
Build a stage to capture action:
There are many different techniques where you can "build a stage" if you know what a subject will do... to get some great photographs.
Wildlife Rules:
If a subject is running/flying/swimming away from you as you approach... then stop moving towards them. Give your subject some space. Plan on spending some time at the place where you're wanting to capture a subject... let them come to you.
Do your homework:
Find out where your subject is going to be, the enviornment that they are usually at, at a certain time and wait there.
Keep your distance:
This is pretty self explanatory. :)
Stalking strategies:
"stay low, move slowly and quietly" when subject is not eyeing you.
Rest every once and a while, to make sure not to move up to quickly
get ready to shoot at any time
Don't Fence them in:
wildlife will feel threatened if you close them in, so avoid it at all cost. You could end up getting trampled, hurting the wildlife, or just losing a good shot.
Vehicles make good blinds:
Use your vehicle as camaflouge!
Peanut Butter Incentitives:
Some photographers like to use bait to bring their subjects to them. This is under your personal disgretion on whether this is ethical or not.
Animals in Action
Be on site before the sun sets:
This is crucial to good photography. Make sure to be there before the sun is setting and you can get some awesome photographs.
Lower that Tripod:
Get down to eye level to provide a more intimate, at their level, kind of feel.
Shoot first, edit later:
Don't be looking at your camera while you're in the field... you may miss some amazing shots!
Sharping your focus technique:
Use manual focus to focus an image that is in motion. It is often harder to try and use auto focus in these situations because the camera is usually not quick enough to pick out the spot of focus.
Build a stage to capture action:
There are many different techniques where you can "build a stage" if you know what a subject will do... to get some great photographs.
Wednesday, October 21, 2009
Modifying Natural Light
Modifying Natural Light
One size fits all:
It may be a good idea to find filters that fit all lenses... that way you don't have to worry about getting a filter for each lens.
Polarizing Filters:
These filters create "greater color saturation by reducing or elimintating reflected glare" when you are shooting plants, flowers, and water. (be careful when using this filter with a wide-angle lens because the form of the lens will distort the overall coloring will using a polarizing filter.)
Split Neutral Density Filters:
So these filters are great! The book explains they are a "photographer's best friend." This filter is half clear, half darker gray so that you can, for example, darken a light sky to get the proper exposure of the land in your photograph.
Graduated Neutral Density Filters:
This is like the split neutal density filter except that sometimes, when you have a landscape where the sky and the land is not split 50/50 and you may have some trees, plants, or other objects that are more in the sky part than the land, and with a split neutral density those objects would be under exposed, or completely blacked out, therefore, the graduated neutral density filter gradually gets darker to try and avoid that.
Standard ND Filters:
These are used most often for "blurred motion" photos. It decreases the light that is captured with a very low shutter speed that is needed to blur a photo.
Color Modifiers:
These type of filters are your "color-enhancing and warming filters" to assist a photographer in the look they are going for in a photograph.
Blue/Gold Polarizing Filters:
These are used for "sunny days" to "reduce flare, bump up color saturation on land and water, and boost density and chroma of the blue sky."
Portable Reflector:
Dave brought a couple of these to class. These are round, flexible reflectors that reflect light and give you a certain look, whether it is more warming tones, cooling tones... ect.
Fill-in Flash:
Fill-in flashes are used as extra light that you may need, along with natural light, during photographing.
Designing the Picture Space
Dominance:
This section talks about the focus of compositions. In a more basic compostion, you may have on dominant feature that you are basing your photograph around. In more complex compositions, you may find dominane in more than one object. Focusing on those dominant features to create create your breathtaking photographs is a good skill to learn.
Color:
I think that a photographer's taste in the way that they choose to present color in a photograph varies between different photographers. However, the colors in a photograph are what tend to obtain the emotion, awe, and relation for people when looking at photography. Bright, brilliant photos with colors that catch the eye and are luminate in the composition create a masterpiece.
The Center of Interest:
Part of being a photographer is having the creative eye to find a focus or an element that you are wanting to shine in a photograph. When trying to place the center of interest, the center is always a good idea because that is where the eye tends to lead to. There is also the rule of thirds. This is when the "center of interst is to be placed one-third of the way from the top or bottom of the frame and one-third of the way from either side."
Colorado Trip
Kendra Timm - Senior Photos

This trip included my first real senior photo shoot. It was a great experience and I am excited for this upcoming November as I have a few other jobs already lined up. I feel like this practice is really helping my photography skills and I'm looking forward to continue it and learning along the way.


Subscribe to:
Posts (Atom)