www.bhmemoirs.blogspot.com
Wednesday, January 13, 2010
New Blog
I have created a new blog that coincides with my portrait photography. That is where all my updated pictures will be placed from now on! Stop by and check it out sometime in the future.

Wednesday, December 2, 2009
5 Favorite Pics from Project
 I like this picture because of the shadows the trees are making.
I also like the colors in the foreground and the dark blue of the sky.
It would have been nice to have more going on in the sky, it's kinda bland.
I do like the blue though.
 I really liked how all of these pictures turned out.
It was a simple landscape piece, but I feel like that's what makes it fun.
I also love how the blue in the background really gives a great backdrop.
The way the branch lays is nice, as well.
 I really like this picture.
This is one of my favorite from Yellowstone.
I absolutely love these dead trees. So cool.
The branches are awesomely shaped and I like the focused/out of focus areas complementing eachother.
Once again,t he sky was really blue that day and I think it makes a great backdrop.
 I appreciate these birds... and this picture.
It took me forever to get them to fly and so this was quite the accomplishment for me.
I like the motion blur of the wings and the fairly infocus heads and bodies.
The splashes in the water add to the dynamic.
 This is another really simple picture.
 I love reflections and the colors are fairly bright in this one and I like it.
I also like the angle of the reflection..
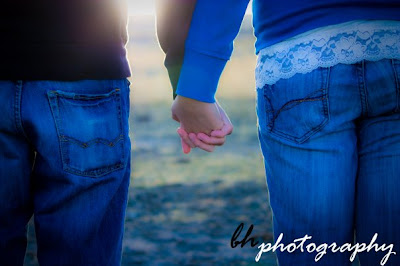
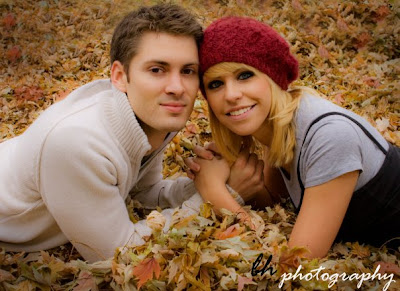
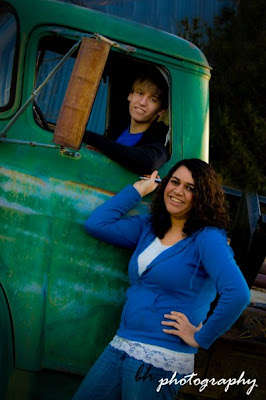
I really liked the work of this photographer who would set up scenes to represent certain mental states. Her pictures on "writer's block" and"obsessive compulsive disorder" were extremely interesting. I really wanted to find her, but after an unsuccessful attempt to google her, I've given up and am just going to post a few of my portraits I've been workin on recently.


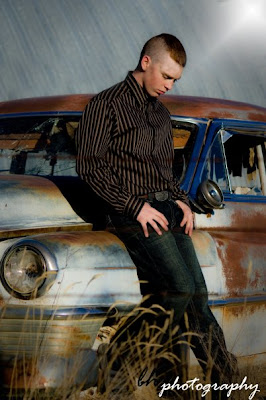
Rocky Seniors Display
To be completely honest, I did not make it to the exhibit this week.
However, I did some research on the exhibit and was able to view a couple pictures that were displayed.
I was able to find out that there were three seniors whose art was included in this particular exhibit. Those three are Cassie Scheidecker, Krista Hoyes, and Monica Geary.
I found an article (after googling the exhibit) about the exhibit that had a photo attached by Cassie Scheidecker. The photo was of a person, presumably her, who was playing the guitar, but her arms and hands were surrounded by barb-wire. This photo was intended to represent the struggles Scheidecker has with a severe case of arthritis and how it complicates the things she loves to do. I found this particular composition inspiring, touching, and very emotional. It was an amazing photograph.
However, I did some research on the exhibit and was able to view a couple pictures that were displayed.
I was able to find out that there were three seniors whose art was included in this particular exhibit. Those three are Cassie Scheidecker, Krista Hoyes, and Monica Geary.
I found an article (after googling the exhibit) about the exhibit that had a photo attached by Cassie Scheidecker. The photo was of a person, presumably her, who was playing the guitar, but her arms and hands were surrounded by barb-wire. This photo was intended to represent the struggles Scheidecker has with a severe case of arthritis and how it complicates the things she loves to do. I found this particular composition inspiring, touching, and very emotional. It was an amazing photograph.
Wednesday, November 18, 2009
doesn't get more real than this. :)

Nie Nie Dialogues:
There is a blog that I like to read frequently.
It's by a woman named Stephanie Nielson.
She was in a airplane crash a while ago,
and suffered severe burns on most of her body.
She is an avid blogger and uses creative
photography to show the essence of her life
at home with her kids and husband.
She doesn't do photography professionally,
I believe, but her work is so amazing, down
to earth, and real. I admire it with
gusto. It really shows life in it's purest form
and I really relate to it.
And she uses a canon rebel xsi. *smile*
Plus! Her whole life style is based around
vintage everything, which is totally
awesome...
http://nieniedialogues.blogspot.com/

Monday, November 16, 2009
Photography Assignment
USE OF THE COLOR RED
This is a branch off of a crab apple tree on campus
I used the lowest f stop (4) on my EF-S 55-250mm IS


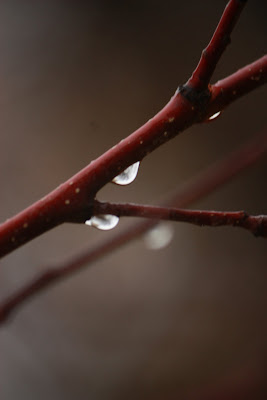
A REFLECTION AS A MAIN POINT OF INTEREST
I focused on the one rain drop and the reflection of the branches you can see in it
I also used my EF-S 50-250mm IS for this shot

A SILHOUTTE AS A MAIN POINT OF INTEREST
This shot was taken in Rim Country with Dave's 70-200mm IS during sunset
I used a low f-stop and a low shutter speed for this photograph

USE OF LENS HYPERFOCAL SETTINGS
As I was looking through my photos to post on my blog, I realized that I had forgotten to take a photo using the hyperfocal settings on my camera. I, therefore, took a photograph that was "somewhat" in focus and used editing tools to sharpen it as much as possible. To have done this correctly while shooting, I should have raised the f-stop up and consequently brought my shutter speed down. However, this picture was taken at (I believe) an aperture of 5.6 which is typically too low to get a clear, focused picture from front to background.
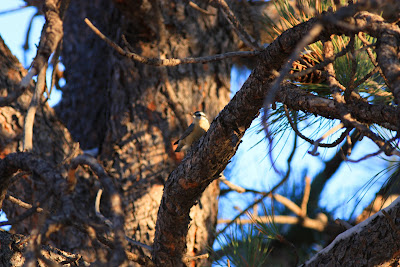
USE OF PANNING/BLURRED MOTION
I used a panning motion while trying to capture this bird at Rim Country. However, in the process, the settings on my camera were not accurately placed and I could have not had my camera completely steady, plus the movement from the bird gave a little blur to the picture. This was also taken using Dave's 70-200mm.
DETAILED CLOSE UP
This was taken on Rocky's campus of a tree branch attached to a tree. I used my 50-250mm to take this shot and put the f-stop down to a 4 to create a highly blurry background and a small focus point.
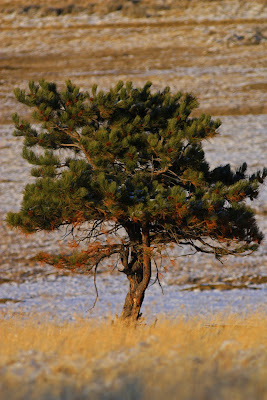
CLEAR USE OF THE "RULE OF THIRDS"
This tree was shot in a prairie dog town in Rim Country. It was a lone tree in the plain of the town and I thought it somewhat interesting. I tried using the Rule of Thirds to evening split the landscape and create a photograph under this particular rule.
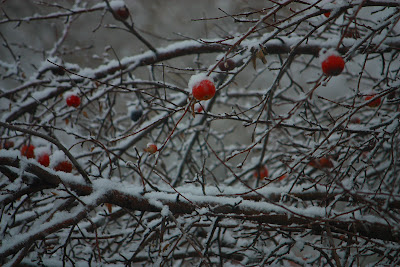
YOUR PICK
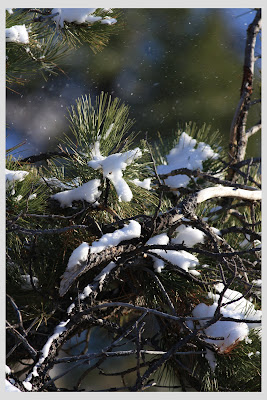
I like this photograph because it gives a clear, focued look of the branch and the snow placed on top of it, but you also get some snow falling in the background which I think looks pretty cool. :)
Monday, November 9, 2009
Randy Smith
www.randysmithphoto.com
So I was on a search for commercial photographers again.
I typed in "commercial photography" and this guy caught my eye.
His name's Randy Smith and he does a wide variety of commercial photography.
Some of his genres include aviation, travel, vehicle, and product photography.
I found his work inventive and interesting.
The whole commercial photography field gets more and more appealing.
check it out.
So I was on a search for commercial photographers again.
I typed in "commercial photography" and this guy caught my eye.
His name's Randy Smith and he does a wide variety of commercial photography.
Some of his genres include aviation, travel, vehicle, and product photography.
I found his work inventive and interesting.
The whole commercial photography field gets more and more appealing.
check it out.
Thursday, November 5, 2009
Britney Higgs Photography
I officially got my website up last week, thanks to help from Dave.
It's a work in progress, definately, but I'm just glad it's up and running!
http://britneyhiggs.smugmug.com/
It's a work in progress, definately, but I'm just glad it's up and running!
http://britneyhiggs.smugmug.com/
Tuesday, November 3, 2009
Wildlife Portraits
Leave Wide-Angle Lenses in the Bag
It is better when shooting wildlife portraits to not use a wide-angle. This is because of the distortion that occurs when using a wide-angle lens. The perspective in which a photographer uses a wide-angle lens does not, for the most part, fit into wildlife portraiture.
Telephoto Advantages
Keeping your distance can be important while shooting animals that you could potentially hurt or that could potentially hurt you. Therefore, telephoto lenses come in quite handy. A telephoto’s “narrow angle of view also allows for a colorful-blurred out background and different focus points on your subject that can give it an artistic edge or whatever look you’re going for.
Build a Three Layer Picture Space
We saw this in a previous section. This is when you spilt up the picture into three planes – foreground, midground, and background. The foreground is composed of the blurred visions, or maybe greenery, insignificant subjects, or other things that are not crucial to have in focus. The midground is composed of your subject and this should, usually, be in focus. The background should also be out of focus… or whatever you’re going for.
Sizing up the subject
Don’t spend a whole lot of time shooting just any wildlife. Find the most attractive. J
Facial Features in Focus
To us humans, we care most about the facial features of an animal, therefore photographers usually tend to put their faces in focus.
Group Portraits
To take a wildlife group portrait, try focusing on only one subject and letting the others complement that particular subject. Try to capture the way the subjects relate to each other and the relationship that they have.
Lighting
Two best times for lighting: early in the morning or late in the afternoon. Take your pick.
Finding Photogenic Landscapes
Color First
In a great photograph, there is amazing color. Therefore, when shooting a landscape look for bright colors that capture the eye… particularly red.
Clouds Make the Difference
Clouds just emphasize the beauty of a landscape. Different photographers have different opinions on what kinds of clouds make the best portraits. In the book, the author says a few of his favorites are “the cotton ball, and cumulous variety.”
Calm Atmosphere for Detail
When you are by a body of water, there’s no wind, and the reflection of the mountains are shining off the top of the water, you have an amazing photograph and take the opportunity to shoot it.
Let It Snow
Snow and the “fog, mist and falling snow infuse ordinary landscapes with a moody energy.” Depending on the look you’re getting, shooting in the snow is a great way to get an artistic, creative landscape photo.
North/South Camera Angles
These particular camera angles will “record landforms when they are illuminated by sidelight.” To catch the lighting just right, using north/south angles will do that for you and you will be able to capture amazing photographs.
Foreground Detail
Catching foreground detail puts a certain beauty into the picture. The foreground detail is what catches your eye and brings you into the picture. It can have a pretty awesome, dramatic effect.
Lunar/Solar Accents
Check your calendar for awesome lunar/solar accents then go shoot ‘em!
No Human Artifacts
For “the most peaceful and productive experience” try really hard to find landscapes that are free from human symbols (telephone poles, highways, ect.) and humans to get that rustic, authentic feel to your photograph
Leave Wide-Angle Lenses in the Bag
It is better when shooting wildlife portraits to not use a wide-angle. This is because of the distortion that occurs when using a wide-angle lens. The perspective in which a photographer uses a wide-angle lens does not, for the most part, fit into wildlife portraiture.
Telephoto Advantages
Keeping your distance can be important while shooting animals that you could potentially hurt or that could potentially hurt you. Therefore, telephoto lenses come in quite handy. A telephoto’s “narrow angle of view also allows for a colorful-blurred out background and different focus points on your subject that can give it an artistic edge or whatever look you’re going for.
Build a Three Layer Picture Space
We saw this in a previous section. This is when you spilt up the picture into three planes – foreground, midground, and background. The foreground is composed of the blurred visions, or maybe greenery, insignificant subjects, or other things that are not crucial to have in focus. The midground is composed of your subject and this should, usually, be in focus. The background should also be out of focus… or whatever you’re going for.
Sizing up the subject
Don’t spend a whole lot of time shooting just any wildlife. Find the most attractive. J
Facial Features in Focus
To us humans, we care most about the facial features of an animal, therefore photographers usually tend to put their faces in focus.
Group Portraits
To take a wildlife group portrait, try focusing on only one subject and letting the others complement that particular subject. Try to capture the way the subjects relate to each other and the relationship that they have.
Lighting
Two best times for lighting: early in the morning or late in the afternoon. Take your pick.
Finding Photogenic Landscapes
Color First
In a great photograph, there is amazing color. Therefore, when shooting a landscape look for bright colors that capture the eye… particularly red.
Clouds Make the Difference
Clouds just emphasize the beauty of a landscape. Different photographers have different opinions on what kinds of clouds make the best portraits. In the book, the author says a few of his favorites are “the cotton ball, and cumulous variety.”
Calm Atmosphere for Detail
When you are by a body of water, there’s no wind, and the reflection of the mountains are shining off the top of the water, you have an amazing photograph and take the opportunity to shoot it.
Let It Snow
Snow and the “fog, mist and falling snow infuse ordinary landscapes with a moody energy.” Depending on the look you’re getting, shooting in the snow is a great way to get an artistic, creative landscape photo.
North/South Camera Angles
These particular camera angles will “record landforms when they are illuminated by sidelight.” To catch the lighting just right, using north/south angles will do that for you and you will be able to capture amazing photographs.
Foreground Detail
Catching foreground detail puts a certain beauty into the picture. The foreground detail is what catches your eye and brings you into the picture. It can have a pretty awesome, dramatic effect.
Lunar/Solar Accents
Check your calendar for awesome lunar/solar accents then go shoot ‘em!
No Human Artifacts
For “the most peaceful and productive experience” try really hard to find landscapes that are free from human symbols (telephone poles, highways, ect.) and humans to get that rustic, authentic feel to your photograph
Thursday, October 29, 2009
Getting Close/Animals in Action
Getting Close
Wildlife Rules:
If a subject is running/flying/swimming away from you as you approach... then stop moving towards them. Give your subject some space. Plan on spending some time at the place where you're wanting to capture a subject... let them come to you.
Do your homework:
Find out where your subject is going to be, the enviornment that they are usually at, at a certain time and wait there.
Keep your distance:
This is pretty self explanatory. :)
Stalking strategies:
"stay low, move slowly and quietly" when subject is not eyeing you.
Rest every once and a while, to make sure not to move up to quickly
get ready to shoot at any time
Don't Fence them in:
wildlife will feel threatened if you close them in, so avoid it at all cost. You could end up getting trampled, hurting the wildlife, or just losing a good shot.
Vehicles make good blinds:
Use your vehicle as camaflouge!
Peanut Butter Incentitives:
Some photographers like to use bait to bring their subjects to them. This is under your personal disgretion on whether this is ethical or not.
Animals in Action
Be on site before the sun sets:
This is crucial to good photography. Make sure to be there before the sun is setting and you can get some awesome photographs.
Lower that Tripod:
Get down to eye level to provide a more intimate, at their level, kind of feel.
Shoot first, edit later:
Don't be looking at your camera while you're in the field... you may miss some amazing shots!
Sharping your focus technique:
Use manual focus to focus an image that is in motion. It is often harder to try and use auto focus in these situations because the camera is usually not quick enough to pick out the spot of focus.
Build a stage to capture action:
There are many different techniques where you can "build a stage" if you know what a subject will do... to get some great photographs.
Wildlife Rules:
If a subject is running/flying/swimming away from you as you approach... then stop moving towards them. Give your subject some space. Plan on spending some time at the place where you're wanting to capture a subject... let them come to you.
Do your homework:
Find out where your subject is going to be, the enviornment that they are usually at, at a certain time and wait there.
Keep your distance:
This is pretty self explanatory. :)
Stalking strategies:
"stay low, move slowly and quietly" when subject is not eyeing you.
Rest every once and a while, to make sure not to move up to quickly
get ready to shoot at any time
Don't Fence them in:
wildlife will feel threatened if you close them in, so avoid it at all cost. You could end up getting trampled, hurting the wildlife, or just losing a good shot.
Vehicles make good blinds:
Use your vehicle as camaflouge!
Peanut Butter Incentitives:
Some photographers like to use bait to bring their subjects to them. This is under your personal disgretion on whether this is ethical or not.
Animals in Action
Be on site before the sun sets:
This is crucial to good photography. Make sure to be there before the sun is setting and you can get some awesome photographs.
Lower that Tripod:
Get down to eye level to provide a more intimate, at their level, kind of feel.
Shoot first, edit later:
Don't be looking at your camera while you're in the field... you may miss some amazing shots!
Sharping your focus technique:
Use manual focus to focus an image that is in motion. It is often harder to try and use auto focus in these situations because the camera is usually not quick enough to pick out the spot of focus.
Build a stage to capture action:
There are many different techniques where you can "build a stage" if you know what a subject will do... to get some great photographs.
Wednesday, October 21, 2009
Modifying Natural Light
Modifying Natural Light
One size fits all:
It may be a good idea to find filters that fit all lenses... that way you don't have to worry about getting a filter for each lens.
Polarizing Filters:
These filters create "greater color saturation by reducing or elimintating reflected glare" when you are shooting plants, flowers, and water. (be careful when using this filter with a wide-angle lens because the form of the lens will distort the overall coloring will using a polarizing filter.)
Split Neutral Density Filters:
So these filters are great! The book explains they are a "photographer's best friend." This filter is half clear, half darker gray so that you can, for example, darken a light sky to get the proper exposure of the land in your photograph.
Graduated Neutral Density Filters:
This is like the split neutal density filter except that sometimes, when you have a landscape where the sky and the land is not split 50/50 and you may have some trees, plants, or other objects that are more in the sky part than the land, and with a split neutral density those objects would be under exposed, or completely blacked out, therefore, the graduated neutral density filter gradually gets darker to try and avoid that.
Standard ND Filters:
These are used most often for "blurred motion" photos. It decreases the light that is captured with a very low shutter speed that is needed to blur a photo.
Color Modifiers:
These type of filters are your "color-enhancing and warming filters" to assist a photographer in the look they are going for in a photograph.
Blue/Gold Polarizing Filters:
These are used for "sunny days" to "reduce flare, bump up color saturation on land and water, and boost density and chroma of the blue sky."
Portable Reflector:
Dave brought a couple of these to class. These are round, flexible reflectors that reflect light and give you a certain look, whether it is more warming tones, cooling tones... ect.
Fill-in Flash:
Fill-in flashes are used as extra light that you may need, along with natural light, during photographing.
Designing the Picture Space
Dominance:
This section talks about the focus of compositions. In a more basic compostion, you may have on dominant feature that you are basing your photograph around. In more complex compositions, you may find dominane in more than one object. Focusing on those dominant features to create create your breathtaking photographs is a good skill to learn.
Color:
I think that a photographer's taste in the way that they choose to present color in a photograph varies between different photographers. However, the colors in a photograph are what tend to obtain the emotion, awe, and relation for people when looking at photography. Bright, brilliant photos with colors that catch the eye and are luminate in the composition create a masterpiece.
The Center of Interest:
Part of being a photographer is having the creative eye to find a focus or an element that you are wanting to shine in a photograph. When trying to place the center of interest, the center is always a good idea because that is where the eye tends to lead to. There is also the rule of thirds. This is when the "center of interst is to be placed one-third of the way from the top or bottom of the frame and one-third of the way from either side."
Colorado Trip
Kendra Timm - Senior Photos

This trip included my first real senior photo shoot. It was a great experience and I am excited for this upcoming November as I have a few other jobs already lined up. I feel like this practice is really helping my photography skills and I'm looking forward to continue it and learning along the way.


Thursday, October 1, 2009
Commercial Photography
So I have never really considered commercial photography, not that I think I wouldn't like it, I just never really thought of it. The other day, through a series of googling, I was trying to find a photographer, whose gallery I had went to see years ago, in Fallon, Nevada and I came across a few photographers in that area that do commercial photography. They were honestly pretty amazing. I've been inspired. The creativity that has to come along with commercial photography is most interesting and captivating to me. I would love to be able to play around with it.
I couldn't find the website that was my favorite for commercial photography, but this one was pretty sweet as well:
http://www.olgaminkevitch.com/gallery/advertising/advertising.html
I couldn't find the website that was my favorite for commercial photography, but this one was pretty sweet as well:
http://www.olgaminkevitch.com/gallery/advertising/advertising.html
Monday, September 28, 2009

Four Pictures
Four Picture Assignment
These are my awesomely creative photos (cough.)
Meet the only plant in my house and the fish tank where my fish Charlie lives.
1. Low f-stop resulting in need to adjust shutter speed (higher)
***Notice the b.l.u.r. in the background.***
Yeah. That's the result of a low f-stop.
Yeah.

2. Higher f-stop resulting in the need to adjust shutter speed (lower) and I had to up my ISO to 1600 to get the same (or nearly the same) exposure as the one with the lower f-stop
***Notice in focus background***
That would be the result of a higher f-stop.
That's right.
 3. This was taken with a somewhat fast shutter speed.
***Notice the shutter speed was able to "somewhat" stop motion (a.k.a. the bubbles moving in the fish tank)***

4. This photo was taken with a lower shutter speed, thus, the bubbles are blurry as the particular shutter speed was too slow to capture motion.
***Notice out of focus bubbles.***

Wednesday, September 23, 2009
Four Pictures Assignment
Narrow Depth of Field
To create a narrow depth of field in a photograph, you need to set your camera to a low f stop, and depending on the amount of light, you need to adjust your shutter speed to complement the low f stop. In low light situations, you may need to bump up your ISO so your photograph doesn't come out too dark.
With a low f stop, you are only going to have a small portion of your photograph in focus and the rest will be blurred. The amount of blur in the photograph will depend on your lens and how low the f stop is. (f/1.8=very blurry or not much is in focus, f/22=not blurry or everything's in focus)
On my rebel xsi, the aperture button is on the face of the camera. You have to hold that button down and use the shutter speed dial to adjust the f stop. The ISO button is near the shutter speed dial; both are located on the top right of the camera.
Wide Depth of Field
To achieve a wide depth of field, you need to do the opposite of what you would with a narrow depth of field. Your goal is to get most, if not all, of the photograph in focus, therefore you need to have a higher f stop. From there, you need to adjust the shutter speed and ISO to fit the right exposure with this particular f stop.
(Note: The above mentioned steps are if you have your camera set to manual. There are aperture and shutter priority settings that makes this process easier. In that case, you set your aperture or shutter and the camera does the rest for you to achieve the right exposure.)
Short Exposure
With long and short exposures, your focus is shutter speed. The dial for shutter speed adjustment, as mentioned earlier, is found on the top right hand of the rebel xsi. For a short exposure, your shutter speed needs to be relatively fast. Depending on what you are shooting and the speed in which the object you are shooting is moving... the shutter speed needs to be adjusted. (Faster the object=Faster shutter speed.)
Long Exposure
To get a long exposed picture, once again, use the shutter speed dial and instead of raising the shutter speed for a short exposure, the shutter speed needs to be slow for the long exposure. Long exposures are for inanimate objects, or for blurring of motion. In those situations, the more blur you want, the lower shutter speed you want.
To create a narrow depth of field in a photograph, you need to set your camera to a low f stop, and depending on the amount of light, you need to adjust your shutter speed to complement the low f stop. In low light situations, you may need to bump up your ISO so your photograph doesn't come out too dark.
With a low f stop, you are only going to have a small portion of your photograph in focus and the rest will be blurred. The amount of blur in the photograph will depend on your lens and how low the f stop is. (f/1.8=very blurry or not much is in focus, f/22=not blurry or everything's in focus)
On my rebel xsi, the aperture button is on the face of the camera. You have to hold that button down and use the shutter speed dial to adjust the f stop. The ISO button is near the shutter speed dial; both are located on the top right of the camera.
Wide Depth of Field
To achieve a wide depth of field, you need to do the opposite of what you would with a narrow depth of field. Your goal is to get most, if not all, of the photograph in focus, therefore you need to have a higher f stop. From there, you need to adjust the shutter speed and ISO to fit the right exposure with this particular f stop.
(Note: The above mentioned steps are if you have your camera set to manual. There are aperture and shutter priority settings that makes this process easier. In that case, you set your aperture or shutter and the camera does the rest for you to achieve the right exposure.)
Short Exposure
With long and short exposures, your focus is shutter speed. The dial for shutter speed adjustment, as mentioned earlier, is found on the top right hand of the rebel xsi. For a short exposure, your shutter speed needs to be relatively fast. Depending on what you are shooting and the speed in which the object you are shooting is moving... the shutter speed needs to be adjusted. (Faster the object=Faster shutter speed.)
Long Exposure
To get a long exposed picture, once again, use the shutter speed dial and instead of raising the shutter speed for a short exposure, the shutter speed needs to be slow for the long exposure. Long exposures are for inanimate objects, or for blurring of motion. In those situations, the more blur you want, the lower shutter speed you want.
Tuesday, September 22, 2009
Modifying Natural Light
I found this section of our book quite handy because I've had many questions myself on what filters I should use for different effects that I'm going for.
The book talks about polarizing filters, split neutral density filters, graduated neutral density filters, standard ND filters, blue/gold polarizing filters, and some other items to use while creating the light and colors that you are looking for.
Probably my favorite, or the one I might find most useful is the Split neutral density filters. This is used by a lot of landscape photographers and it enables them to use part of the filter, that has a grey tint on it, to cover a highly lighted area, or overexposed area of the shoot, to darken that part of the image. Genius. :)
The book talks about polarizing filters, split neutral density filters, graduated neutral density filters, standard ND filters, blue/gold polarizing filters, and some other items to use while creating the light and colors that you are looking for.
Probably my favorite, or the one I might find most useful is the Split neutral density filters. This is used by a lot of landscape photographers and it enables them to use part of the filter, that has a grey tint on it, to cover a highly lighted area, or overexposed area of the shoot, to darken that part of the image. Genius. :)
Monday, September 21, 2009
Yellowstone Trip
YELLOWSTONE
 A dead tree in between sulfur stuff...
 some form of growth around a sulfur pool
 the colors in this area amazed me...
 dead trees really captivated my attention on this trip..
 I was trying to get the small drops of water on the limbs of this plant-thingy
This is as far as my lense would go.
Subscribe to:
Posts (Atom)